I know I keep saying this, but this is one of my FAVORITE projects EVER! :) Here is a picture of my kids bathroom before with just a dollar store shower curtain liner:
Blah.
Blech.
Enough already with the blah-blah bathroom!!
This. has. to. end. I looked to the internet for some ideas and was inspired by these:
From Make it and Love it and Show & Tell (two of my favorite blog reads)
A trip to a fabric store or two produced this inspiration:
I started by measuring the shower curtain liner (a new, sturdier one). I cut my main fabric (the yellow and white) into 2 panels the length of the new curtain, plus a few inches for seam allowance. Then sewed the 2 panels together. It was wider than I needed, so I cut the sides to be the width of the liner plus a couple inches for seam allowance. I then hemmed the curtain on the bottom and sides.
Next, the ruffles. Love me some ruffles! I wanted the black and white fabric to be the longest ruffle. I laid it out to determine how long I wanted it.
I made the width of the ruffle almost twice as wide as the curtain so I could gather it. I made sure the ruffle was a little longer than I wanted (for the seam allowance), and hemmed it. Then, I did the same for the top ruffle.
Here is how I gathered the ruffles. Now, I have the cheapest machine out there. I am borrowing my sister in law's machine, which is the most basic machine from Wally World. All it can do is straight and zig zag stitches. But, I am so grateful to have it! First, set the stitch length to the longest length.
Sew two lines of stitching about 1/8" apart along the top of the fabric to be gathered. Then, pull both bottom threads and slide the fabric along the threads creating a gather. That's all there is to it! I always do two rows of stitching to gather, because I have tried doing only one and had the thread break on me. More than once. I was NOT a happy camper when that happened.
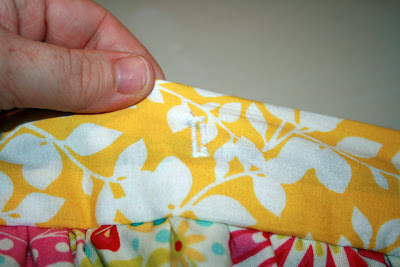
After I gathered each ruffle, I pinned it along the top of the curtain and sewed it on. And here is where I am wishing I took more pictures. Sorry!! OK, I will try to explain as best I can. To cover up the top of the curtain and create a place for the hanging rings to go through, I made a strip of the yellow and white fabric. I made it the width of the curtain, and about 5 inches long. I wanted it to be 2 inches on the front and fold over to be 2 inches on the back, plus seam allowance gave me 5 inches. I sewed it on like a quilt binding. For the front, I put the right sides together and sewed it on. I folded it over to the back, folded up the bottom and hand sewed it.
Clear as mud? Well...almost done!!
I decided that making button holes would be the best way to hang the curtain from the rings. This machine doesn't have a button hole stitch, so I just made them myself. Begin by doing the widest, closest zig zag at the top of where you want the buttonhole. Then, on the left side, switch to a much smaller zig zag and zig zag down to where you want the bottom of the buttonhole to be. When you get to the bottom, switch back to the widest zig zag and sew several stitches. To make the right side, switch back to the smaller stitch, and zig zag back up to the top of the buttonhole by holding the reverse button.
Sometimes, I did a good job:
Sometimes, it didn't come out as good:
It will still work, and not be seen so I was ok with it. :)
I used my seam ripper to slit the center of the buttonhole open. Insert rings and hang.
Voila!! Done! And that is how the cutest shower curtain I've ever had was born.
Sweet ruffles, how I love you!
The whole bathroom looks new now!
And we all lived happily ever after. :)


Tooo cute! I like it VERY much!
ReplyDelete